![]() by Abby on February . 20, 2017 | NO COMMENT
by Abby on February . 20, 2017 | NO COMMENT
Stuck on the problem of how to transfer photos from iPhone to external hard drive with ease? You’ve come to the right place cause we’ re going to offer you an effective way to transfer photos from iPhone to external hard drive.

Primo iPhone Data Recovery can easily transfer your photos from iPhone to external hard drive as backup. Get it downloaded and have a free trial. Click Here to Free Download
Many Apple users complain that their 16GB or 32GB and even 64 GB iPhone fills up with photos especially live photos very quickly. To free up more storage on your iPhone, there is a decent way to solve this problem: transferring these iPhone photos to external hard drive as backup. It’s portable to carry with your external hard drive and you can view your photos on any computer with it. So how can we make it?
For this purpose Primo iPhone Data Recovery is specially recommended for you to move photos from iPhone to flash drive as backup. With this tool, it’s safe to transfer photos from iPhone or iPad to external hard drive without any hassle. Follow the steps below to get more information.
Designed as a comprehensive iOS data recovery tool, Primo iPhone Data Recovery can also help you move iOS data from iPhone iPad to external hard drive and computer as backup. Check some main features of it:

Designed to fit effortlessly into your iPhone data recovery.
Download NowBefore start, you need to Download and install Primo iPhone Data Recovery to your computer and run it. Then connect your iPhone/iPad and external hard drive to computer.
Step 1.Click Settings on the left side bar. Set the Export Path to your external hard drive and choose whether keep the create date of your photos. Choose Save button to continue.

Transfer Photos from iPhone to External Hard Drive – Step 1
Step 2. Choose Recover from iOS Device on the homepage and click Next to start scanning your device data like photos.
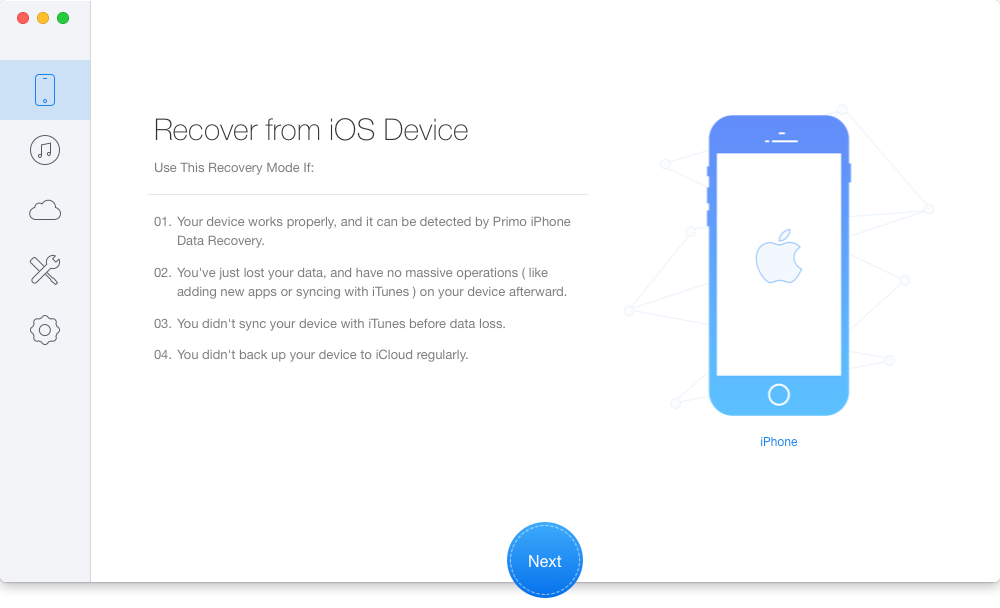
Move Photos from iPhone to External Hard Drive – Step 2
Step 3. Choose Photos after scanning > preview and select the photos you want > choose To Mac/PC > click Recover to start transferring.

Transfer iPhone Photos to External Hard Drive – Step 3
Also Read: How to Transfer Text Messages from iPhone to Computer
As we see, it only takes three steps to finish transferring photos from iPhone to external hard drive with Primo iPhone Data Recovery. You can delete these photos on iPhone to create more available space and keep photos safe at the same time. Now just download it and start a free trial > >

Abby Member of @PrimoSync team, an optimistic Apple user, willing to share solutions about iOS related problems.
Get Up-to-the-minute iPhone Tips & Enjoy Awesome Deals.
![]()
![]()
Design Simple and Beautiful Software
with Passion & Love