![]() by Sissi on Sept. 18, 2017 | NO COMMENT
by Sissi on Sept. 18, 2017 | NO COMMENT
After updating to iOS 11, your iPhone 7 won’t connect to iTunes on your Mac or PC (Windows 10)? This guide will show you some useful tips to fix this issue.

Primo iPhone Data Recovery helps recover lost iPhone data like photos, messages, notes, contacts after iOS 11 update easily. Get it to your computer and discover more.
“I updated my iPhone 7 to iOS 11 beta weeks ago, recently I've noticed that whenever I try to connect (with the USB cord) my iPhone 7 to my computer (currently Windows 10) to sync all of my music, it doesn't show up/ is not recognized at all.”
Upgraded to iOS 11 and now your iPhone 7/6s/6 won’t connect to iTunes? And we’ve heard that many users complain that their iPhone not connecting to iTunes on Windows 10 PC. In this post, we are going to show you some useful tips to fix iPhone 7/6s/6 won’t connect to iTunes Issue after iOS 11 update.
Can’t Miss: How to Recover Deleted Photos on iPhone 7/7 Plus
There are various indefinite reasons why iPhone won’t connect to iTunes. What’s worse, it’s hard to find the specific factor causes this problem. It’s suggested to try some possible solutions to fix it.
On Mac: Run iTunes > Click iTunes > Click Check for Updates. On Windows PC: Open iTunes > Choose Help > Click Check for Updates.
On your iPhone, tap Settings > General > Software Update. Or you can update to latest iOS 11 with iTunes. For more details, you can refer to How to Download and Install iOS 11 on iPhone/iPad >
If you miss it, you need to reset location and privacy data on your iPhone. Tap Settings > General > Tap Reset > Choose Reset Location & Privacy > Type your password > Tap Reset Settings.
If your USB cable is broken or not original one, it may cause the connection problem.
Step 1. Hit Windows logo on the bottom left corner on Windows 10.
Step 2. Click "Settings" > Type Troubleshooting and click it.
Step 3. Click "Hardware and Sound" > select "Hardware and Devices" > click "next" and follow the instructions to troubleshoot your computer.
Step 1. Open "Device Manager" > Expand "Universal Serial Bus controllers".
Step 2. Now right click the first USB controller, click "Uninstall", and do the same for the other USB controllers to uninstall them.
Step 3. Then restart your computer and reinstall the USB controllers.
Step 1. Check to see if Apple Mobile Device Support is installed: Go to Control Panel > Uninstall a program. If it is not installed, you need to reinstall iTunes.
Step 2. Restart Apple Mobile Device Service:
Type services.msc in Run (WinKey+R) and hit enter > Locate Apple Mobile Device or Apple Mobile Device Service and then right click > Properties > Then > Click on Stop to stop the service > Click Start to run the service again> Restart your computer.
For your lost data during the iOS 11 update, like photos, contacts, messages, notes, and more, you can get them back even without backup with the help of Primo iPhone Data Recovery. It allows you to recover lost data from iPhone directly, or from iTunes or iCloud backup. Here are steps to recover data from iTunes backup without restore via Primo iPhone Data Recovery.
For more details you can refer to: How to Recover Lost Data from iPhone after iOS 11 Update >
Step 1. Download and install Primo iPhone Data Recovery to your Windows or Mac computer and run it. Then choose Recover from iTunes Backup and click Next to start scanning.
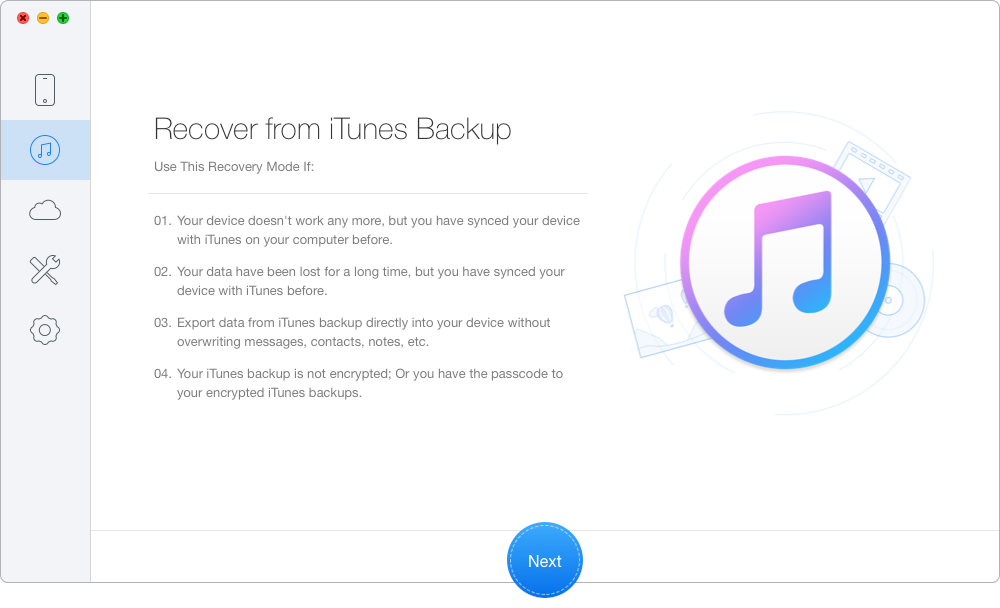
Recover Lost iPhone Data from iTunes Backup – Step 1
Step 2. Choose the iTunes backup of your device from the list and click Next to continue.
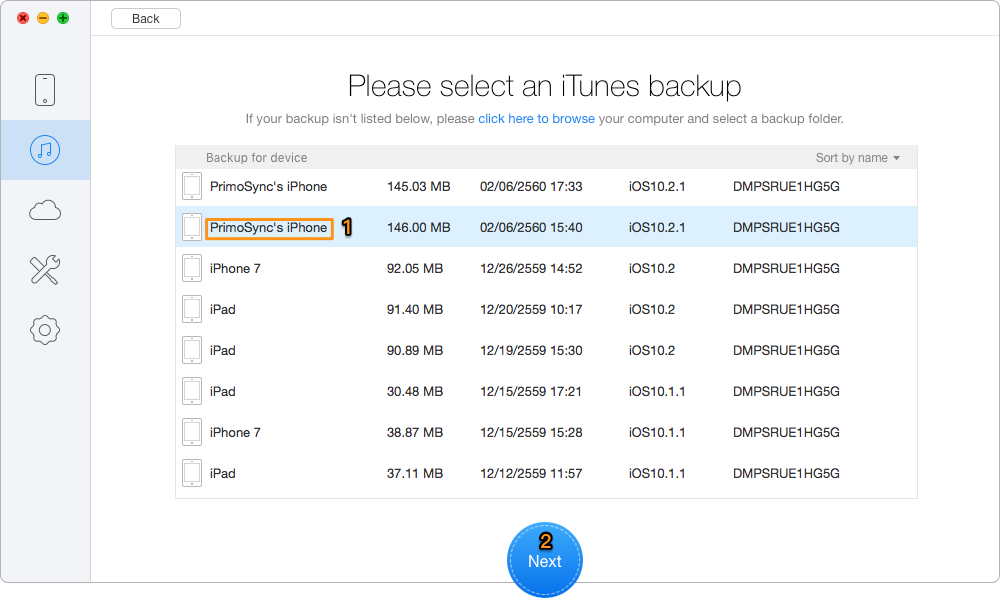
Recover Lost iPhone Data from iTunes Backup – Step 2
Step 3. All your data in iTunes backup will show up after scanning. You can choose the iPhone data you want from iTunes backup and set the export path, then click Recover to start extracting.
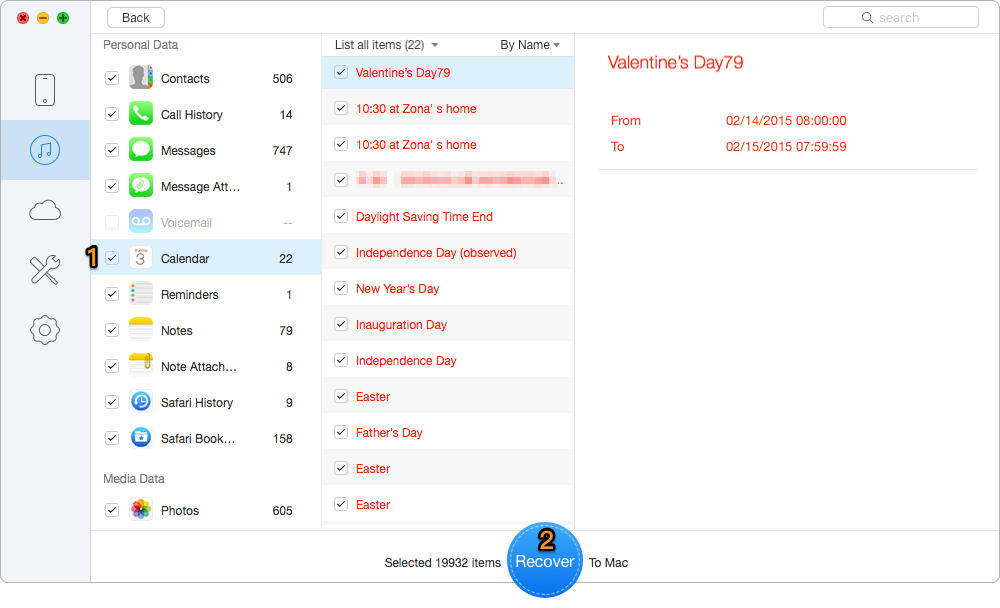
Recover Lost iPhone Data from iTunes Backup – Step 3

Designed to fit effortlessly into your iPhone data recovery.
Download NowObviously you may have fix the problem of iPhone won’t connect to iTunes with the tips we listed above. And Primo iPhone Data Recovery can be a great helper to recover your lost iPhone data from iTunes backup without any data erasing. Why not download it and start a free trial now?

SissiA member of @PrimoSync team, love to go travelling and share some easy-to-follow tips about Apple related issues.
Get Up-to-the-minute iPhone Tips & Enjoy Awesome Deals.
![]()
![]()
Design Simple and Beautiful Software
with Passion & Love